
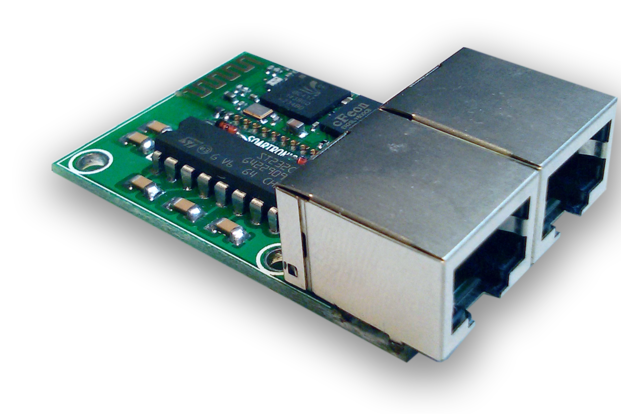
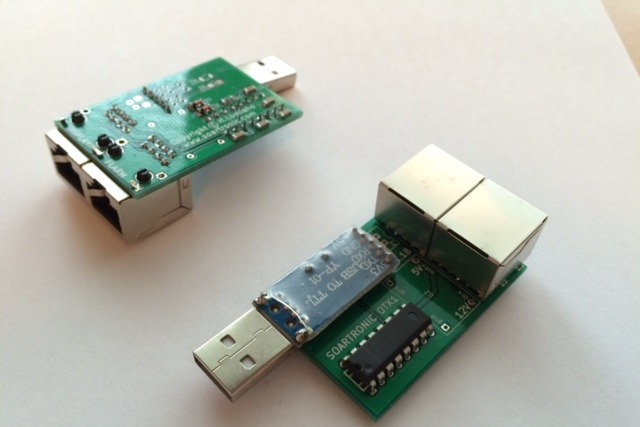
Bluetooth connection module - SoarTronic BT2

Simple connection with standard RJ cables.
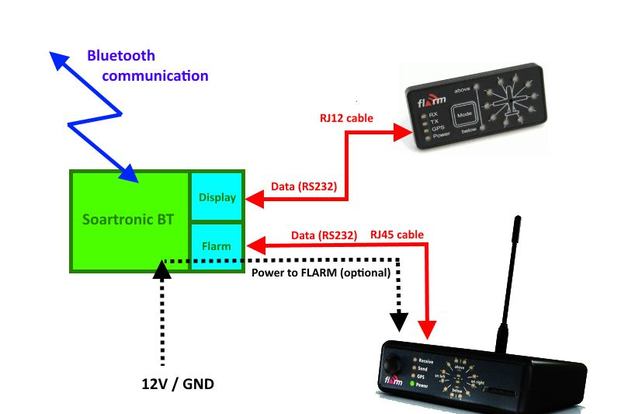


Soartronic BT modules are providing an easy and affordable connection between moving map / flight computers
and FLARM collision warning systems. The Bluetooth chip used can connect most phones and PNA devices.
However, Soartronic BT cannot connect with iPhones and iPads, since the Bluetooth technology used is not approved by Steve J.
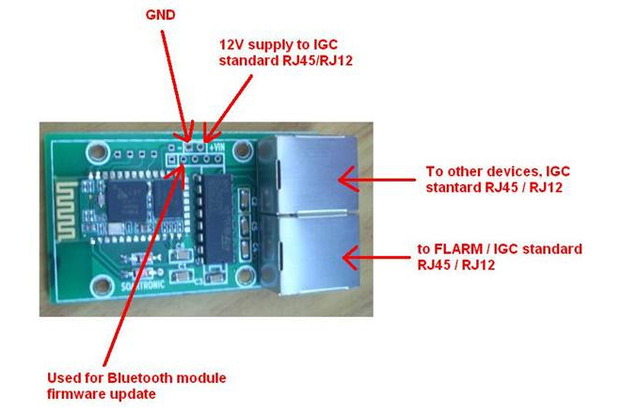
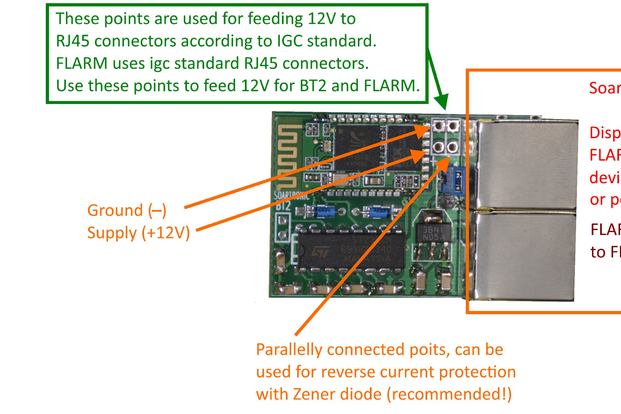
These module connects to FLARM units using IGC Standard RJ45 connectors (can connect also using RJ12 connectors
with 6 wires only).
The original Soartronic BT1 module uses 3.3V supply generated by FLARM modules. It connects like a simple LED based external display. It also draws similar amount of current, 45 mA. FLARM typically can produce 100 mA current, so you can connect one display and one BT1. Soatronic BT1 is a simple plug&play connected device.
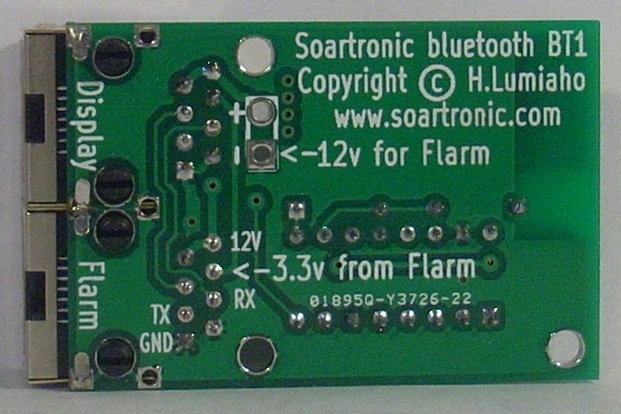
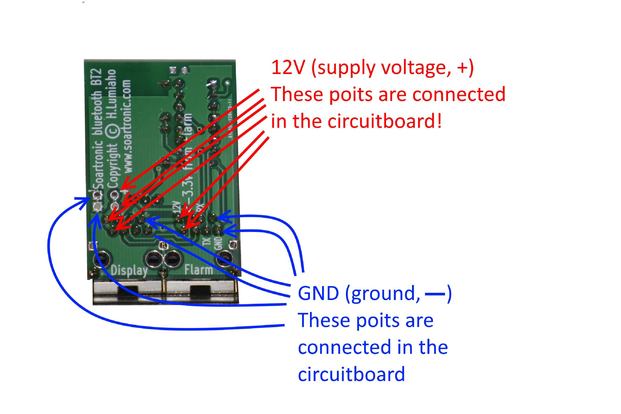
BT2 has a jumper to select between 3.3V from FLARM, or 12V (5-15V) from the RJ45 connector (or from the build-in connection points on the circuitboard). When the jumper is in position 1, BT2 module is operating like the BT1 module. When the jumper is set into position 2, the build-in regulator generated 3.3V for internal use from 5-15 V points of the RJ45 connectors, and the 3.3V line from FLRM is not loaded. Use BT2 if you cannot use the 3.3V supply from your FLARM device, or if you need to connect other devices than FLARMs, or if you feel that you may need that option in the future.
Please note! MiniOZ flarm is not BT1 compatible. refer to manuals for correct connections, you may need to use the BT2 module to ensure power supply to the BT module.
BT1 and BT2 are programmed to operate on 19200 bauds communication speed. This is the standard for FLARM devices.
For more detailed information please refer to Soartronic BT manual.
For housing we recommend Tic-Tac mint box.... see the callery pictures !
Serial communication can cause noice problems with your radio. We recomment using ferrites in all cables. You can order RJ cables from us, with Ferrites. You can also get cables where one end is 8P RJ45 and other end 6P RJ12. These are optimal when connected with RedBox FLARM or display units with 6P port only.
and FLARM collision warning systems. The Bluetooth chip used can connect most phones and PNA devices.
However, Soartronic BT cannot connect with iPhones and iPads, since the Bluetooth technology used is not approved by Steve J.
These module connects to FLARM units using IGC Standard RJ45 connectors (can connect also using RJ12 connectors
with 6 wires only).
The original Soartronic BT1 module uses 3.3V supply generated by FLARM modules. It connects like a simple LED based external display. It also draws similar amount of current, 45 mA. FLARM typically can produce 100 mA current, so you can connect one display and one BT1. Soatronic BT1 is a simple plug&play connected device.
BT2 has a jumper to select between 3.3V from FLARM, or 12V (5-15V) from the RJ45 connector (or from the build-in connection points on the circuitboard). When the jumper is in position 1, BT2 module is operating like the BT1 module. When the jumper is set into position 2, the build-in regulator generated 3.3V for internal use from 5-15 V points of the RJ45 connectors, and the 3.3V line from FLRM is not loaded. Use BT2 if you cannot use the 3.3V supply from your FLARM device, or if you need to connect other devices than FLARMs, or if you feel that you may need that option in the future.
Please note! MiniOZ flarm is not BT1 compatible. refer to manuals for correct connections, you may need to use the BT2 module to ensure power supply to the BT module.
BT1 and BT2 are programmed to operate on 19200 bauds communication speed. This is the standard for FLARM devices.
For more detailed information please refer to Soartronic BT manual.
For housing we recommend Tic-Tac mint box.... see the callery pictures !
Serial communication can cause noice problems with your radio. We recomment using ferrites in all cables. You can order RJ cables from us, with Ferrites. You can also get cables where one end is 8P RJ45 and other end 6P RJ12. These are optimal when connected with RedBox FLARM or display units with 6P port only.
In Stock
Cables

Soartronic RJ11 --- RJ45 cable with ferrite

Soartronic modules use RJ45 connectors, with 8P connector (8 connection points). Many display devices and some FLARM types use RJ12/11 type 6P connector (6 connection points). It is recommented to use RJ12/11 ----- RJ45 cable for connection those devices with Soartronic devices.
RJ cables are easy to make, if you have suitable cable, connectors and tools. You can also order them from here.
All RS232 emit noice on aviation radio frequensies. Therefore it is recommented to use Ferrites around the cables. You can order Ferrites from eBay for example. If you order cables from us, we can include the ferrites.
This is picture of a 40 centimeter cable with RJ11/RJ12 (6P) and RJ45 (8P) connectors and ferrite. Type of ferrite may change.
This is the cable you need for example for
- LX Naviagation FLARMS (RedBox, MiniBox, etc.)
- FLARM display with 6P connector
FLARM devices may have RJ connectors with either 6 (RJ11/RJ12) or 8 (RJ45) contacts. According to IGC standard the middle 6 contacts are identical, and the contacts 1 and 8 are same as their neighboring contacts (i.e. contacts 1 and 2 are same, and contacts 7 and 8 are same).
Soartronic delivers all cables using 6P cable (so that in 8P RJ45 connector the contacts 1 and 8 are not used).
In Stock
NEW! Soartronic OGN Tracker
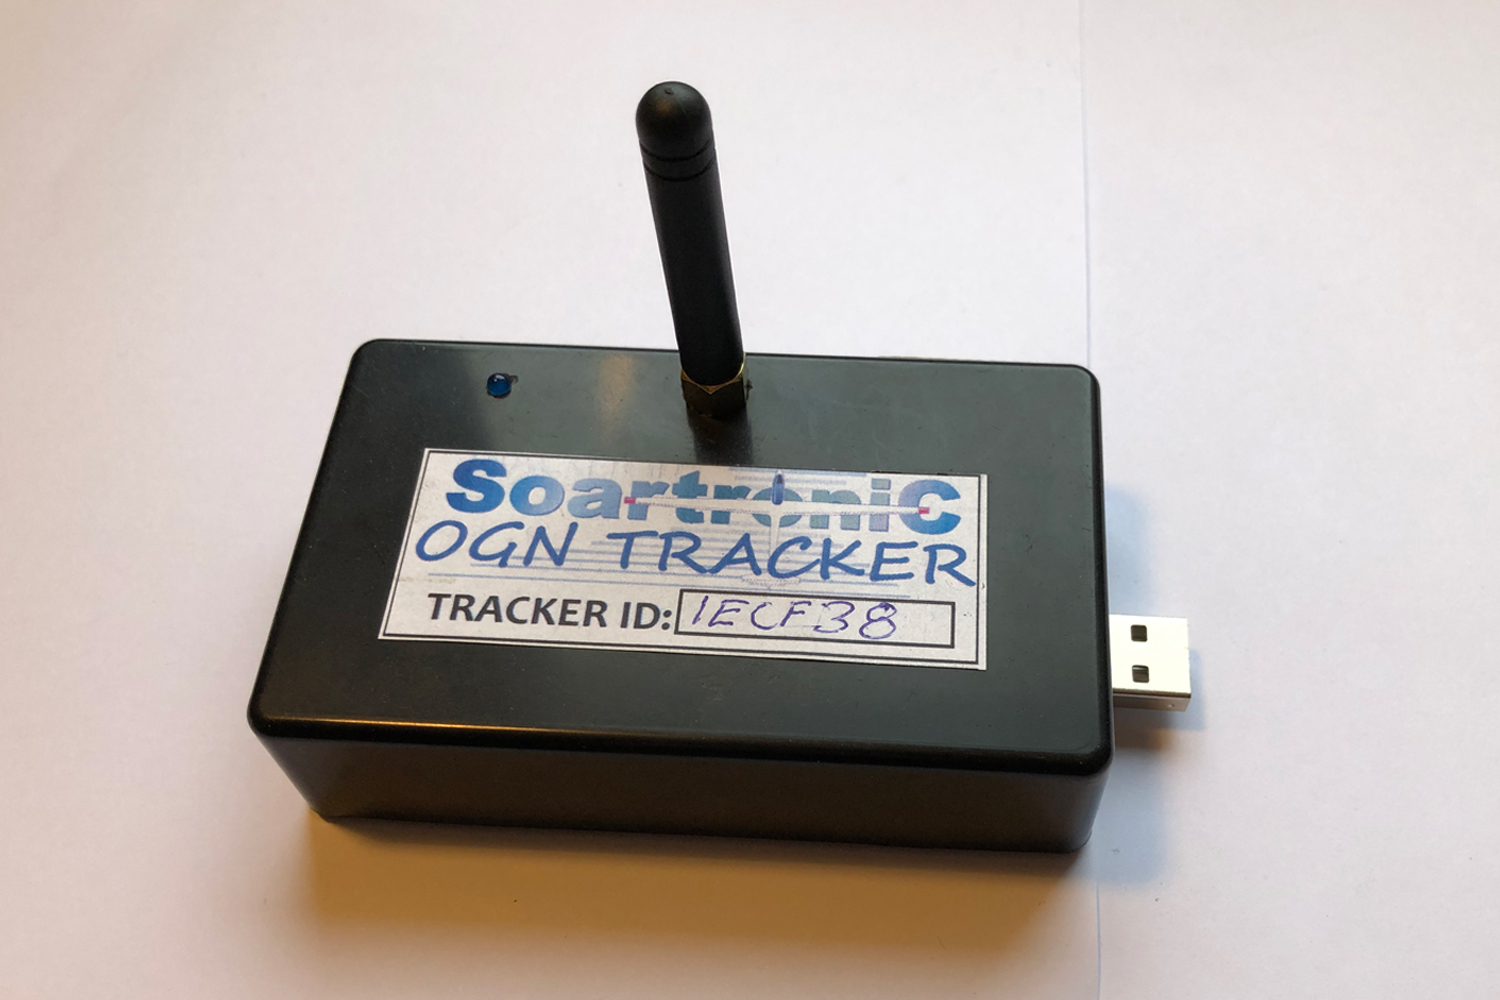
OGN Top with antenna

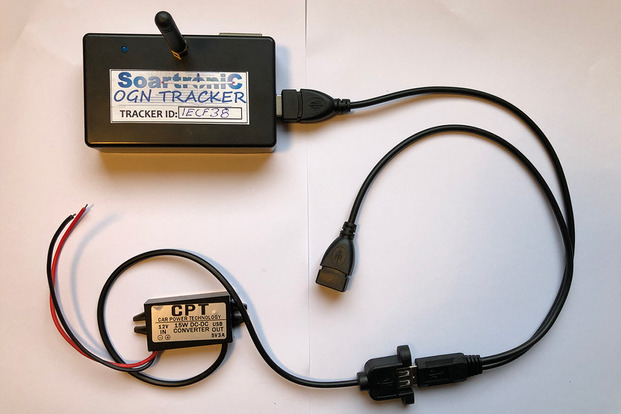
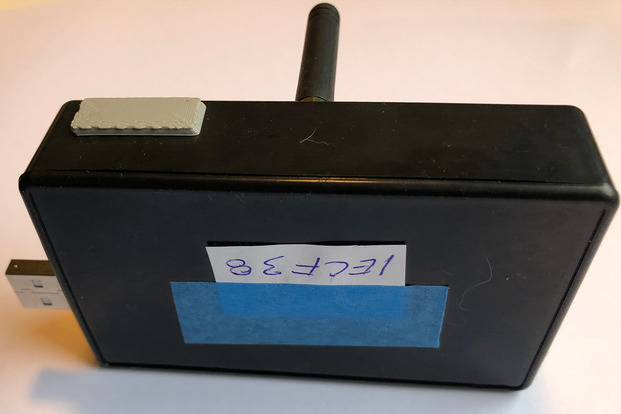
Plug and Play Soartronic OGN tracker that just requires adding the user account in OGN and entering the code written on the SOARTRONIC Tracker housing.
Included in the package:
1 PCs OGN Tracker (ready to use)
1 PCs 12/5VDC power source
1 PCs Antenna
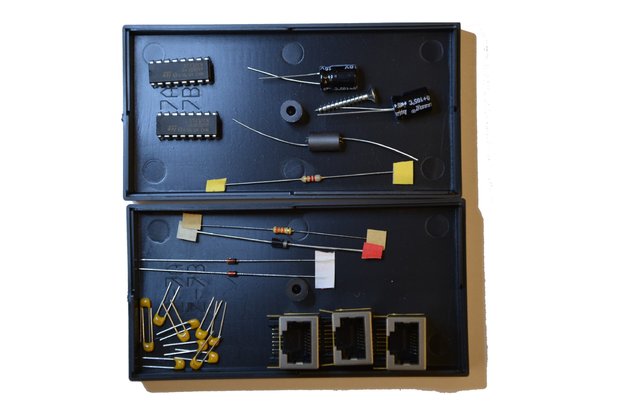
This is DIY electronics and the following components have been used:
- Soartronic PCB
- Radio part:
- Microprocessor ship:
- Power source/voltage converter:
Like with all Soartronic devices Soartronic will provide technical support and replace faulty units within 1 year of the delivery, or if a replacement unit is not available at the time of claim, return the payments.
No EASA Form 1 or any approvals are provided, this is low cost DIY electronics.
How To Use:
Optional:
If you want to add the Soartronic OGN Tracker to the OGN Database, follow this link: http://wiki.glidernet.org/ddb
Note!
FASTEST ORDERS WILL ALSO GET ADDITIONAL
Included in the package:
1 PCs OGN Tracker (ready to use)
1 PCs 12/5VDC power source
1 PCs Antenna
This is DIY electronics and the following components have been used:
- Soartronic PCB
- Radio part:
- Microprocessor ship:
- Power source/voltage converter:
Like with all Soartronic devices Soartronic will provide technical support and replace faulty units within 1 year of the delivery, or if a replacement unit is not available at the time of claim, return the payments.
No EASA Form 1 or any approvals are provided, this is low cost DIY electronics.
How To Use:
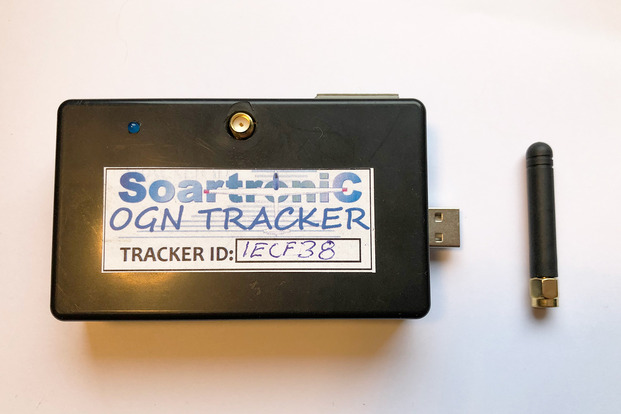
- Insert an antenna to the tracker
- Plug in 5V USB
- Wait a little while that the tracker makes a GPS connection and then the device is visible on OGN tracking. (see examples: https://glideandseek.com , https://www.navplan.ch/#/traffic)
Optional:
If you want to add the Soartronic OGN Tracker to the OGN Database, follow this link: http://wiki.glidernet.org/ddb
Note!
- OGN tracker ID uses HEX numbers 0-9 and letters A-F. Using other letters can cause troubles.
- USB port outputs NMEA messages (GPS & OGN) to KOBO etc. Android can’t read these messages.
FASTEST ORDERS WILL ALSO GET ADDITIONAL
- Longer antenna 19,5cm / 18cm (default 5cm)
- USB Y cable
In Stock
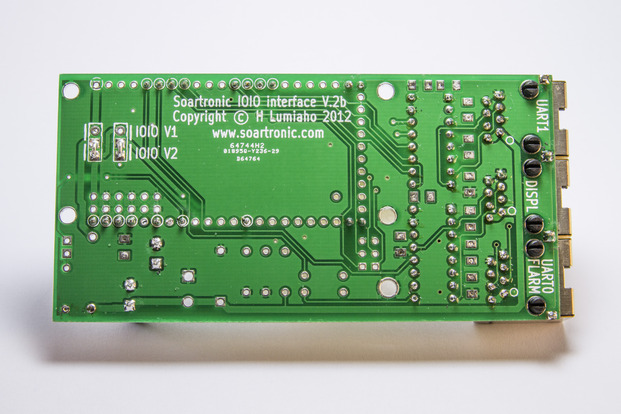
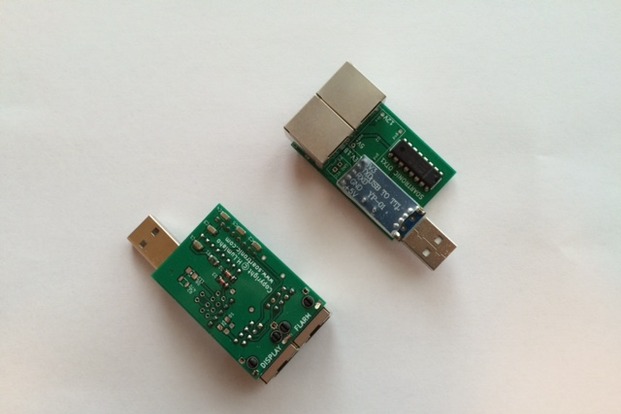
IOIO UART interface board
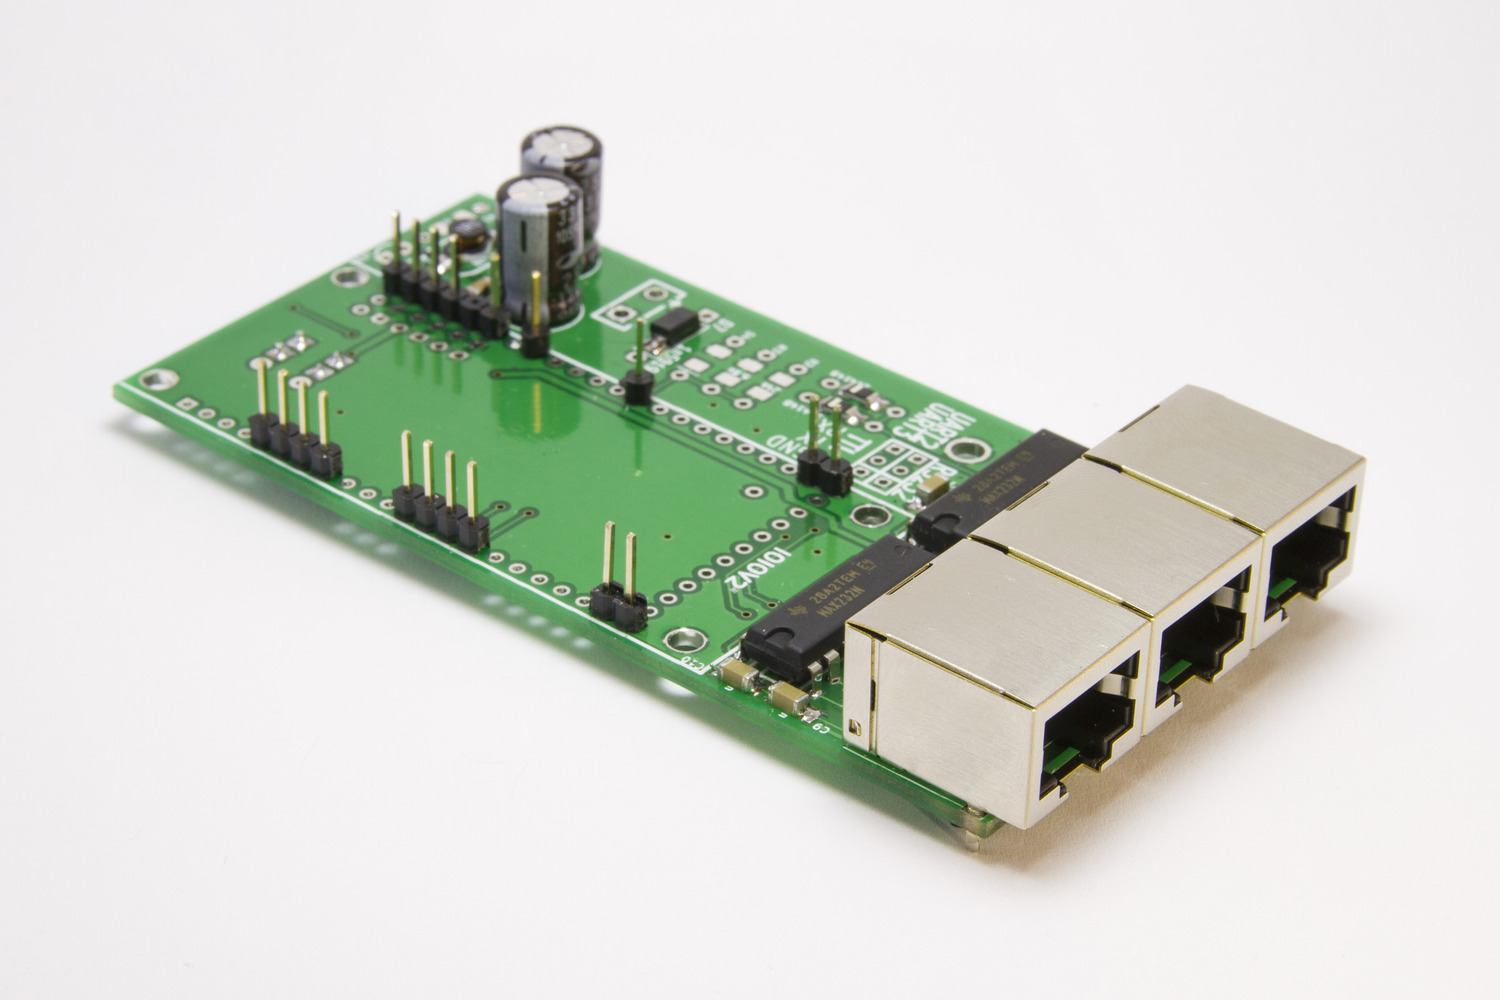
IOIO UART interface board V.2e

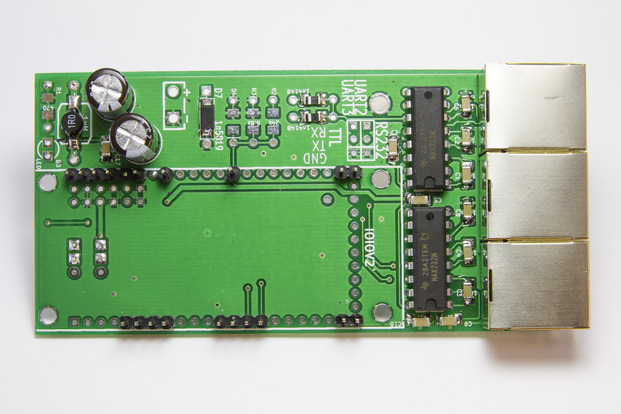
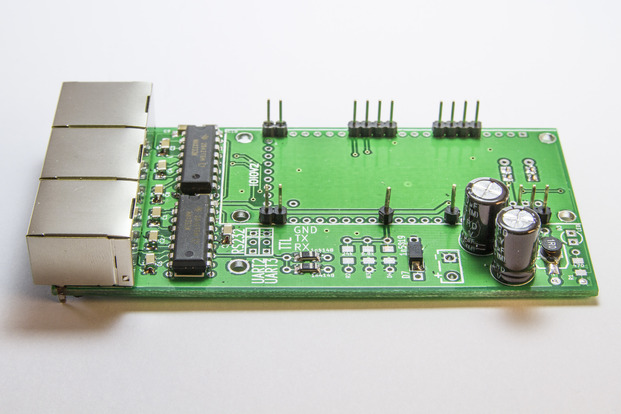

In this project we developed an UART interface board which is connected with IOIO board sold by Sparkfun. IOIO
board is developed by Ytai, for more information I recommend you to visit https://github.com/ytai/ioio/wiki.
The IOIO board is soldered onto the UART interface pcb. The USB port of the IOIO is used for charging the Android
device connected, and for communication.
IOIO UART interface Board is optimized for use with XCSoar program http://www.xcsoar.org.
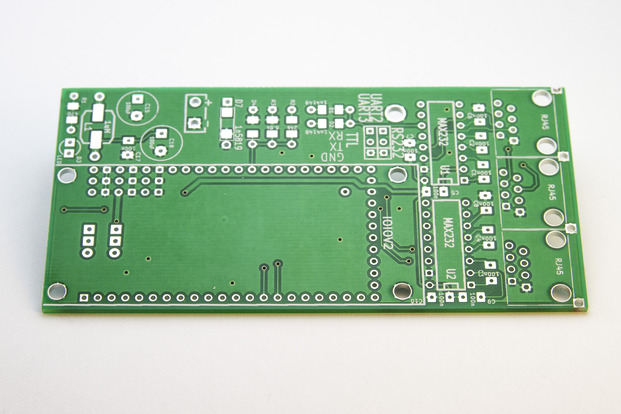
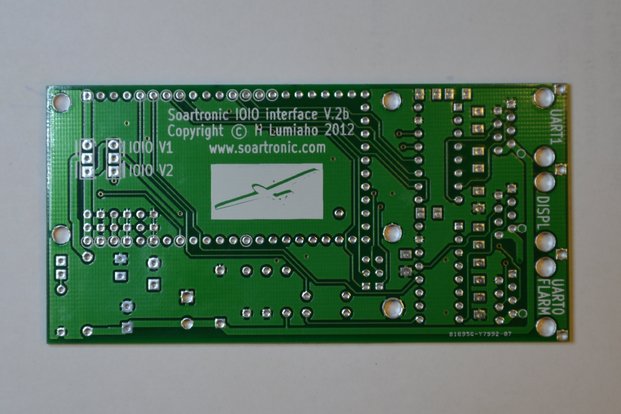
Uart interface board is available as a diy kit (pcb and parts) or pcb only, you also need to order IOIO card
from Sparkfun.
You will find assembly instructions from support page.
board is developed by Ytai, for more information I recommend you to visit https://github.com/ytai/ioio/wiki.
The IOIO board is soldered onto the UART interface pcb. The USB port of the IOIO is used for charging the Android
device connected, and for communication.
IOIO UART interface Board is optimized for use with XCSoar program http://www.xcsoar.org.
Uart interface board is available as a diy kit (pcb and parts) or pcb only, you also need to order IOIO card
from Sparkfun.
You will find assembly instructions from support page.
In Stock
Open Vario PCBs
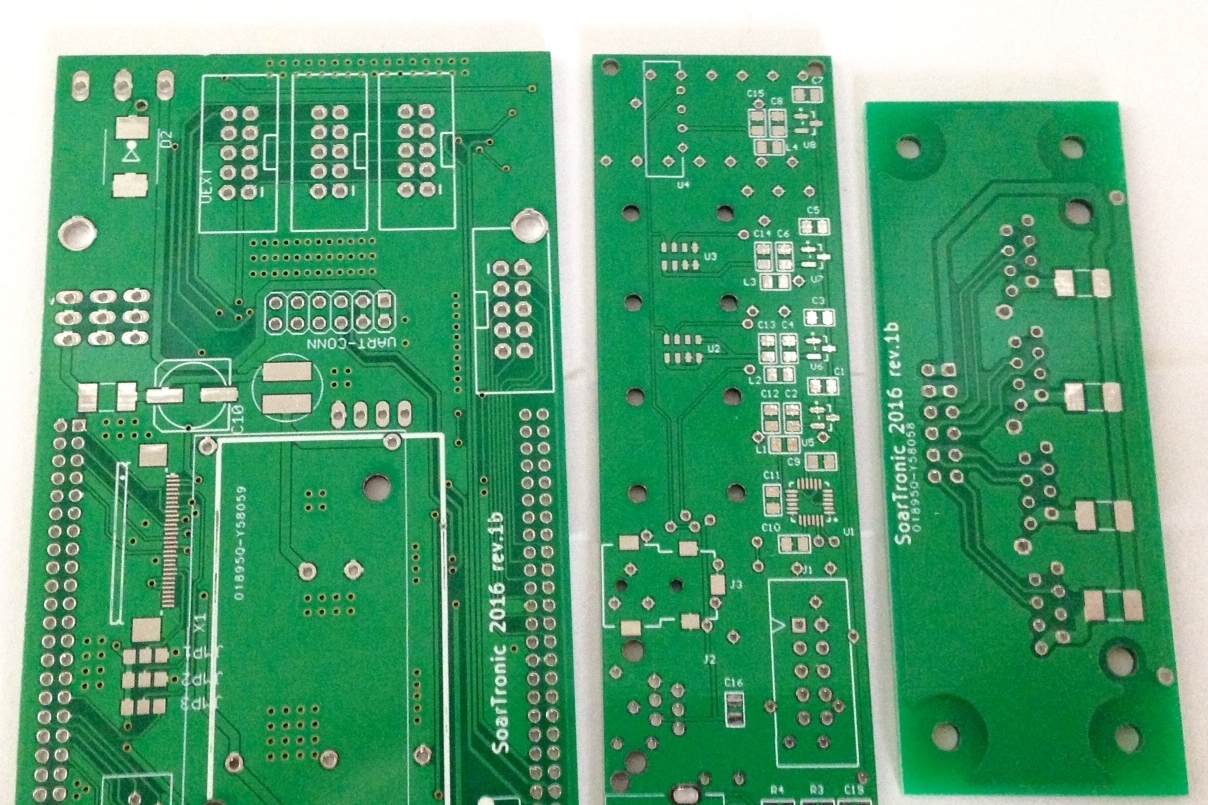
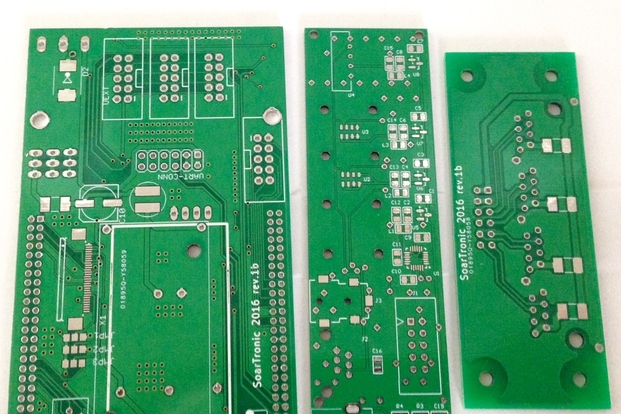
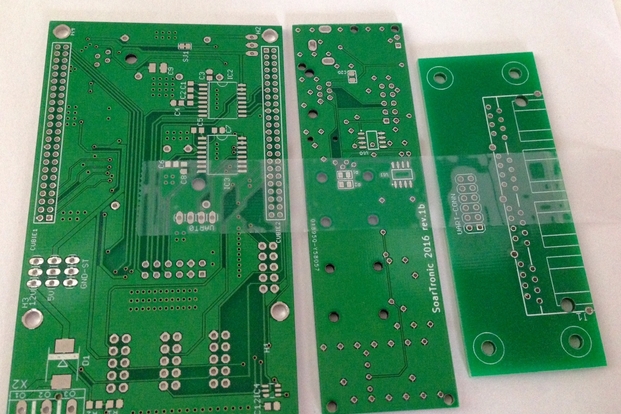
Open Vario PCBs 20 EUR, shipping 9 EUR world-wide
Open vario product needs 3 PCB boards, and you can order them from here. Open Vario is not Soartronic project, so we cannot give to you any technical support.
We just have the PCBs available from our WEB shop. For technical support please contact Open Vario project members.
What is included is 3 PCBs,
1. Adapter board,
2. Sensor board and
3. RJ45 board.
http://www.openvario.org/doku.php
20 EUR + 9 EUR shipping world-wide.
In Stock
Soartronic OTX-2RJ

Soartronic OTX-2RJ
Soartronic OTX-RJ2 is same as OTX-RJ2-5V but without the build-in 5V power supply. For 5V power supply you can either use a USB Y cable and 5V power supply, or connect your own external 12V/5V power supply to clearly marked connection points. If you use USB HUB, you can bring 5V into one of the USB connectors.
Please note, that the 12V and GND wiring of the OTX-2RJ-5V and OTX-2RJ are directly connected with the 12V and GND pins of the RJ45 connectors, according to FLARM/IGC standard. This means, that
- You can power your FLARM via the OTX module
- If you connect FLARM cabling that is already connected to 12V, OTX receives also 12V via RJ cable
- You should NOT feed 12V to OTX module from different sources, specially not behind two separate fuses!!!
Also Soartronic OTX-2RJ provides communication with KOBO and charging for KOBO.
You can connect all Soartronic OTX modules into a HUB, and get several RJ232 communication lines to your KOBO. In that case, make sure that you have only one 5V supply active in your system!
For the housing we recomment Tic-Tac mint box, in which you make a hole for the USB connector.
Price 46 EUR (+ shipping)
(Please send email if you need this prodict, and we will look if we have components in stock and come back to you ASAP)
In Stock
Soartronic OTX-2RJ-5V

Soartronic OTX-2RJ-5V
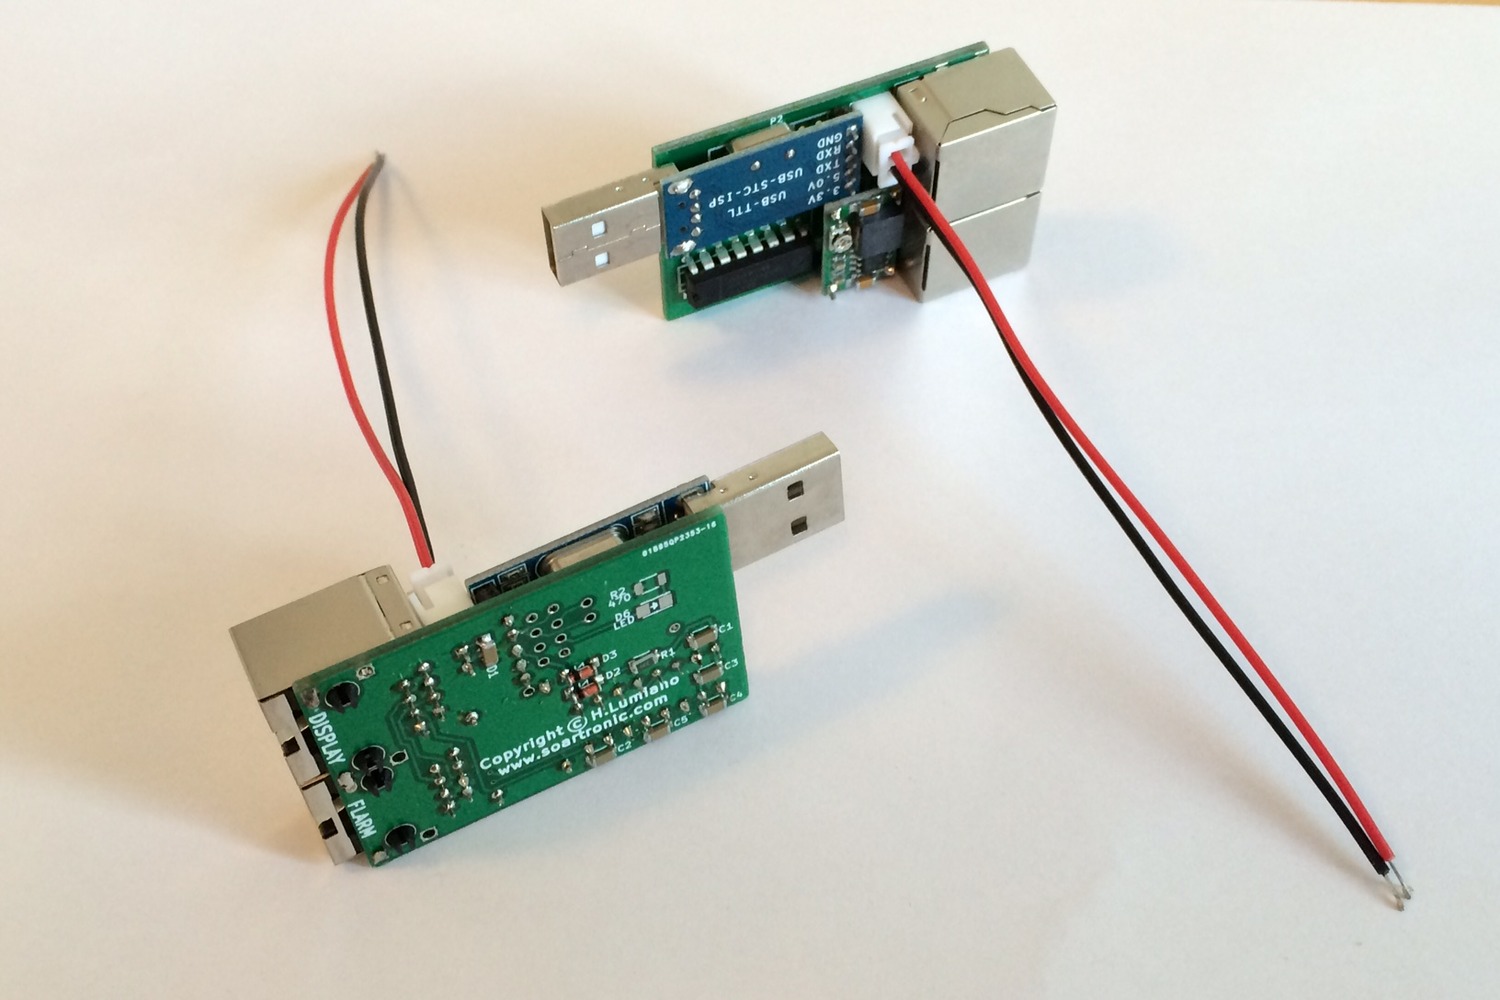
This device connects your FLARM with KOBO running XCSoar, and it also generates 5V for charging your KOBO. It needs 5-15 V power supply to its own wiring. Please make sure you have a fuse (1A recommended) in the wiring.
You need USB-A Female/Female converter or cable.
Sometimes the build-in 12V/5V power source has caused disturbances to aviation radio. The disturbances most likely come from the shiels of the RJ45 cable. Please use as short RJ cables as possible, with ferrites.
Please note, that the 12V and GND wiring of the OTX-2RJ-5V and OTX-2RJ are directly connected with the 12V and GND pins of the RJ45 connectors, according to FLARM/IGC standard. This means, that
- You can power your FLARM via the OTX module
- If you connect FLARM cabling that is already connected to 12V, OTX receives also 12V via RJ cable
- You should NOT feed 12V to OTX module from different sources, specially not behind two separate fuses!!!
For the housing we recomment Tic-Tac mint box, in which you make a hole for the USB connector.
For the FLARM connection this device has a build-in smart RJ45 splitter. Please connect "Flarm" port to Flarm and "Display" port to other devices. Soartronic RJ45 splitter is smart, you can connect Flarmm from your KOBO or from the device connected to the "Display" port, as long as you do not try to do that from both places simultaneously. So declare/fly switces are not needed.
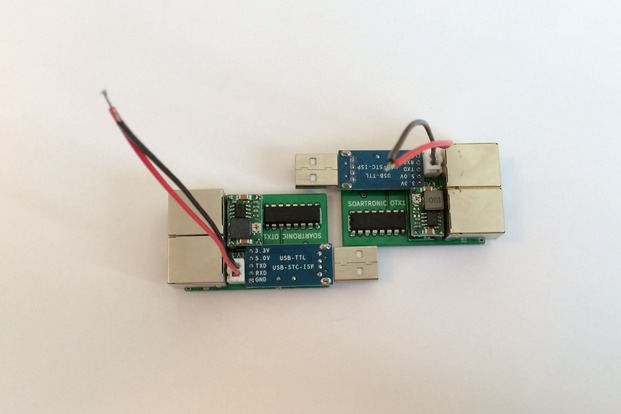
For 2 seater planes you can connect two (or more) Soartronic OTX devices in series. You can also connect OTX modules, Soartronic BT modules or Soartronic IOIO UART interfaces in series, if you want to have connectivity for several devices. Soartronic OTX module does not use 3.3V from FLARM.
Price 54 EUR (+ shipping)
(Please contact us by email to order this product)
This device connects your FLARM with KOBO running XCSoar, and it also generates 5V for charging your KOBO. It needs 5-15 V power supply to its own wiring. Please make sure you have a fuse (1A recommended) in the wiring.
You need USB-A Female/Female converter or cable.
Sometimes the build-in 12V/5V power source has caused disturbances to aviation radio. The disturbances most likely come from the shiels of the RJ45 cable. Please use as short RJ cables as possible, with ferrites.
Please note, that the 12V and GND wiring of the OTX-2RJ-5V and OTX-2RJ are directly connected with the 12V and GND pins of the RJ45 connectors, according to FLARM/IGC standard. This means, that
- You can power your FLARM via the OTX module
- If you connect FLARM cabling that is already connected to 12V, OTX receives also 12V via RJ cable
- You should NOT feed 12V to OTX module from different sources, specially not behind two separate fuses!!!
For the housing we recomment Tic-Tac mint box, in which you make a hole for the USB connector.
For the FLARM connection this device has a build-in smart RJ45 splitter. Please connect "Flarm" port to Flarm and "Display" port to other devices. Soartronic RJ45 splitter is smart, you can connect Flarmm from your KOBO or from the device connected to the "Display" port, as long as you do not try to do that from both places simultaneously. So declare/fly switces are not needed.
For 2 seater planes you can connect two (or more) Soartronic OTX devices in series. You can also connect OTX modules, Soartronic BT modules or Soartronic IOIO UART interfaces in series, if you want to have connectivity for several devices. Soartronic OTX module does not use 3.3V from FLARM.
Price 54 EUR (+ shipping)
(Please contact us by email to order this product)
In Stock